Onions, Leeks and Shallots

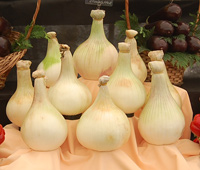
Onions are a class act; leeks, garlic, shallots, chives and the familiar white onion are really just the beginning.
“Let onion atoms lurk within the bowl, And, scarce-suspected, animate the whole.” - Sydney Smith
Picture, above: the onion family has beautiful flowers, too! These are chive flowers together with honeysuckle.
Easy-to-grow members of the onion family
Why grow members of the onion family?
Onions, leeks and shallots are such an essential part of most people's diets. They provide a tasty starting point for so many recipes and they are really all quite easy to grow. Most world cuisines use them extensively too.
Harvesting them all is simple and they are not hard to store either, so if you are trying to be a little greener by growing more of your own food and so cutting your family's "food miles", these are excellent crops to grow.
Growing and harvesting onions

Onions can be grown from seed or as sets.
Sets are small immature onions which you place in the soil so that they can resume growing. The advantage is that they are easy to see and handle and they are quite reliable.
You can get seeds direct from Amazon.
Buy your sets from a reputable supplier in the spring. (There are also some varieties which can be planted in autumn.) Make sure that they are firm and dry and there is no sign of rot. They are usually very cheap - less than £1.00 a bag in Britain this year. A small bag should give you a reasonable crop - not enough for self-sufficiency though.
It is best to plant onions in soil which has been manured some months beforehand. If you plant onion sets in freshly manured soil, they are more liable to bolt.
Prepare a bed by hoeing off any weeds and raking the soil to produce a fine tilth (a fancy word for texture - the soil should be light, well-worked, even and reasonably free of stones and debris).
Wait for a couple of days to let the ground settle again. Choose a time when the soil is damp but not cold.
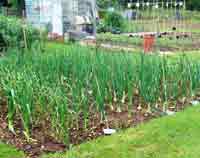
Push the little onions (sets) into the soil about 6-8 inches (15-20cms) apart. The growing tip should remain visible. Make sure the pointed growing tip is uppermost! It's easiest to put them in regular rows as later you need to hoe them. You are less likely to knock the odd one out of the ground with the hoe if they are in rows.
If you don't much care for exact rows, you can grow them in spirals or curves, or even intercrop them with other plants such as lettuce. You can also leave some gaps for companion plants such as marigold which helps keep pests away.
Protecting Your Crop
You will probably need to cover your crop with netting to prevent birds from tugging them out of the ground and throwing them about.
Fix netting with small sticks or pegs to clear the tops of the onions by a few inches. If you have really persistent birds you may need to peg the sides too so that they really cannot get at your precious onions.
Once you have done this the baby onions will start developing new roots and will fix themselves into the soil. They don't need so much protection after a few weeks. They will start to send out a new shoot from the pointed tip.
The only help they should need is to keep the soil reasonably clear of competing weeds.

Harvesting your onion crop
Harvesting onions is simple. Wait for the tops to be dying back and withering in the summer then, in dry weather, simply lift them and leave them on the surface for a few hours to dry out.
If the ground is at all damp put them onto a rack or hang them on a fence. Try not to bend the stalks if they are still green as you lose valuable nutrients which will otherwise absorb back into the bulb as it dries.
Then collect them together and store them in a hessian sack, paper sacks or bags or keep them in a wicker basket.
You can even store them for a while in plastic carrier bags if you roll them down around the crop to expose the tops (so that the carrier bag acts like a basket around them). Add a paper towel beneath them.
It is a good idea to turn them from time to time and check for any rot. If you inspect them fairly regularly and keep them somewhere coolish but quite dry they should last for weeks.
Of course, if you are feeling adventurous you can make those plaits that French onion sellers used to use and then hang them from a hook.
Sponsored links
Flavoursome Leeks

Leeks are amazingly easy to grow. They will tolerate the harsh conditions of winter and grow well whenever they get the chance. Most varieties do tend to bolt in warmer weather but with a little careful selection of varieties you should be able to enjoy them throughout the year.
I find it's easiest to grow them from seed in deep boxes of soil or compost so that they get a flying start. You can sow them directly into well tilled earth but you will need to be vigilant so that they are not struggling with competing weeds. You also may need to thin them.
Picture: leeks by 2757, courtesy of Flickr
Growing Leeks from Seed
Take a deep seed tray or a small box and fill it with damp compost or light loamy soil. Sow the seeds, scattering them lightly on the surface, not too thickly. Cover them with half an inch of soil or compost and firm them down. Make sure that they stay damp.
When they have grown to nearly the thickness of a pencil it is time to put them in their final growing positions. Select a site which has been well manured and which is free of weeds.
Get or make a dibber. This is just a pointed stick with a handle and is an invaluable tool for planting leeks. If you don't have one a strong pointed stick or a long, narrow trowel will do just fine.
Push the dibber or stick into the earth vertically until a hole about 4-5 inches (10-12cms) deep is made. Take a strong leek seedling and drop it into the hole. If it disappears, you've gone too deep! The leek should be easily visible above the ground but the roots and part of the stem should be in the soil. If you are using a trowel you may need to keep the trowel in the ground to keep the earth from falling back in as you feed the root into the hole. Just slide the trowel out carefully.
Follow it up with a good slosh of water and you are done. The water has a puddling effect in the soil and helps the roots to anchor. You don't need to backfill the soil at all - this happens gradually by itself.
Plant out all your leek seedling at intervals of about 6-8 inches (15-20cms) in rows. Make the rows about 18 inches apart so that there is ample growing room. (You can grow them much closer together if you don't mind small leeks.) Now all you have to do is keep them reasonably weed free.
If you like your leeks blanched you may want to draw soil up against the growing stems from time to time. This also helps to support them.
Harvesting Leeks

Leeks can be harvested anytime, as soon as the stems get to about 3/4 inch (2cms) thick or even less. Small leeks are really more tasty on the whole. You may need to use a fork or spade to lever them out of the earth, especially if they are large. Just chop off the roots and the more straggly outer leaves with a spade or machete.
You can use the green leaves in cooking or even in salads. They are not quite as tender as the blanched stem but they are flavoursome and full of vitamins.
Good varieties include Blue de Solaise and Monsterueux de Charentanwhich are very hardy. Musselburgh leeks are also a by-word for hardiness.
Picture: Leeks by Mig, courtesy of Flickr.
Storage
Leeks do not store well at room temperature so keep them in the fridge or freeze them after blanching for a few moments.
For information on using leeks please see the notes on cooking and recipes in Green Recipebook.
Growing Shallots
Shallots are a valuable addition to any kitchen. They are tasty and versatile and they store even better than onions. Plant them much like onion sets (above).
Place single shallots into warm, dampish soil in March or April (northern hemisphere). (See the notes on using onion sets, above - the method is the same.)
Space them about 10 inches (28cms) apart and protect them from birds with netting or twigs wound with cotton thread covering the area.
The soil should be well tilled and weed free of course. Do not apply manure or rich fertilisers for some time before planting as this makes them more likely to bolt.
Once the plants are established, they only need hoeing to keep them reasonably weed free.
In hot weather shallots may tend to bolt (run to seed). To prevent this it is better to buy smallish ones to begin with as they are less likely to do this. Nipping the growing flower heads off may stop them bolting if the weather also changes! You can still eat them if they bolt but they are tougher. As with most of the onion family, you can also harvest the flowers and eat them.
Harvesting and storing your crop
See the harvesting notes for onions above.
Shallots can store for twelve months or more. You may want to pull the bulbs apart so that they dry out more thoroughly.
You can also grow new shallots from your own harvest next year. It's a good idea to buy in fresh shallots for planting from time to time to avoid the build up of diseases.
*****
How to Grow Onions, Leeks and Shallots - TOP
How to Grow a Vegetable Garden
Greenfootsteps Home - for more easy green living ideas
| Tweet |

| Tweet |

On other pages
Footprints
- an occasional e-zine from Greenfootsteps
If you would like to receive the e-zine, please just sign up below.


New! Comments
Have your say about what you just read! Leave me a comment in the box below.